Some useful information about Fredrix Inkjet canvas:
Matilda’s Own patchwork quilting templates are laser-etched acrylic shapes which can be used in both hand and machine patchwork. The template pieces are made in Australia of translucent plastic, and include cross-lines to help centre blocks, and small holes marking corners and seam allowances. They are especially useful for fussy cutting on both light and dark fabrics. The pieces include a 1/4" (6mm) seam allowance so the cut piece will be the exact size needed for your project. The measurements given on all pieces are the cut size of the pieces and are for use in the American piecing technique.
Tips for using the templates in various patchwork quilting techniques.
Machine Piecing: Place the template piece on the fabric. Position it over the fabric pattern as desired. Hold the template piece firmly and use a small diameter rotary cutter to cut all around the piece. With the included 1/4" (6mm) seam allowance the cut piece will be the exact size needed for your project.
Hand Piecing: Trace around the template piece with a fine marking pen. Use the marking holes in the template to mark the corners. These markings will help to align the pieces accurately for hand-stitching.
Fussy Cutting: Matilda’s Own templates are clear and fluorescent green. This facilitates positioning the template piece over particular sections of a fabric pattern before cutting out the fabric piece. It allows you to select which parts of the fabric design you wish to have on any part of a block.
DMC Stranded Cotton is made with finest long staple cotton and is mercerised twice to give embroidery an exceptional sheen.
It comes in 6 easily divisible strands allow you to vary the weight of your stitches to add depth to any project.
Colors use highly resistant, colourfast dyes so embroidery will not fade as a result of washing or exposure to light. 8 metres per skein
Laundry care:
Colours are washable and fade resistant.
Please take into account the fabric onto which you have embroidered.
DMC recommends washing with a mild soap.
After washing, wrap the embroidery in a towel to remove excess water, then dry flat.
Place the embroidery on a clean cloth, preferably while still damp, and iron on the reverse side, at the temperature setting recommended for the fabric.
Batting, sometimes called wadding, is the layer which goes in between a quilt top and the backing. It provides the insulation which allows the quilt to prevent heat loss. It also provides thickness and affects the drape and look of the finished quilt.
Most batting is treated to prevent the fibres from separating once the quilt is finished and in use. There are a few different methods for achieving this.
Needle punching is one method used today. The fibres are punched through a fine netting or scrim in a process which causes tangling of the fibres. This holds the fibres together. Batting can be needle punched without scrim. This results in a softer batting but the fibres can be more easily pulled apart.
Other methods use glues or heat to bind fibres together but result in a stiffer batting.
Batting which has been needle punched with scrim can be quilted with stitching as much as 25cm apart and will hold together well without separation of fibres. Batting without scrim should be quilted with stitches no more that 15cm apart for stability.
Main characteristics of batting
Loft
This term refers to the weight and thickness of batting. Low loft batting is thin and high loft batting is thick.
Insulating properties
Wool is the most effective insulating batting material, followed by polyester, then bamboo, and lastly cotton.
Colour
Batting is available in white, natural, and black. Black is a good choice when the quilt top is made with darker colours.
Batting Types
Wool: Great for hand or machine quilting and has the best insulating properties.
Polyester: Perfect for hand quilting and also fine for machine quilting. Light weight.
Bamboo: Ideal for machine quilting. Environmentally friendly production process.
Cotton: Great for machine quilting but can be difficult to hand quilt.
Blended Fibres: These combine the best qualities of the incorporated fibres.
Heat resistant: Use for oven gloves, place mates, and other items requiring heat resistance.
Fusibles: This batting makes patchwork quilting projects easier by eliminating the need to baste, pin, or tack. It is best used on small projects.
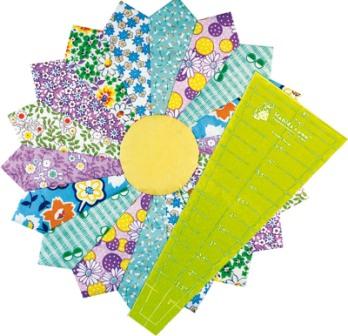
Freezer paper is an incredibly useful item to have in the sewing room. Here are some of the ways it can be used in sewing, patchwork, and more.
Cutting out shapes for appliqué in fabric can be difficult. Try drawing the shape onto the dull side of freezer paper. Cut out the paper shape and iron it onto your chosen fabric with the shiny side facing the fabric. Use a hot iron with no steam. Cut carefully around the shape. If desired leave a seam allowance all around for turning under. Peel off the freezer paper and use the fabric shape as an appliqué piece, either with the edges turned under and stitched, or with machine stitched finish. The freezer paper shape can be reused many times.
Freezer paper makes great stencils for applying paint decoration. Draw a selected design onto freezer paper. Cut out the design keeping the outline as the stencil. Place the stencil onto a piece of fabric or even a T-shirt and use a hot iron without steam to fix it in place. Use a sponge or stencil brush to apply fabric paint. Allow the paint to dry before removing the paper stencil.
In the English Paper Piecing patchwork technique freezer paper can be used as a template. Cut the shapes for the design out of freezer paper, iron the shapes onto the fabric, cut around each shape leaving seam allowance for turning under. Pres the seam allowance towards the back or the piece. Hand sew the pieces together according to the overall design. Peel away the freezer paper.
Use freezer paper to stabilize fabric so that it can be put through a printer. Cut freezer paper to A4 size. Iron the A4 paper onto the wrong side of the chosen fabric with shiny side facing the fabric. Use a hot iron with no steam. Make sure the edges are well pressed. Use a sharp rotary cutter and a ruler to slice about 2mm off the edge which will be pulled through the printer first. This removes any loose threads. Press this edge one more tie if needed to make sure the paper and fabric are well fixed together. Put through a printer using a setting for thicker paper. Leave to dry well before peeling off the freezer paper.
Our range of counted cross stitch kits, and charts includes designs from brands like DMC, Country Threads, Caronie, and Make It . You will find Australian animal and bird designs, floral cross stitch designs, Australian cross stitched landscapes, and childhood or birth celebration designs. Some of our cross stitch charts can be downloaded after purchase
Weight calculated postage.
Safe shopping with PayPal or Stripe.
10% everyday discount for registered customers.